
I have always dreaded cleaning my makeup brushes hence I do not clean them as often as I would wish to. If you’re reading this now I am pretty certain you’re just like me. I could use the time to cater for other good stuff like shopping, logging in on Netflix or even trying out a blogger-approved cut crease. Even though I wear makeup quite often than an average lady would I try to delay cleaning those brushes for as long as I can manage?
It feels awesome having a clean and fresh squeaky beauty blender lashing on to your face, rather than having a caked on makeup on the brush from past usage. It is important to realize that cleaning your makeup brushes not only assist it to last longer but also help in the removal of germs and bacteria within.
Makeup brushes that are not properly cleaned can cause serious damages to the skin and eyes. According to a board-certified dermatologist Joel Schessinger, M.D he said ‘’Not to mention, buildup that gathers on dirty makeup brushes causes them to deteriorate quicker, affecting your makeup application”. Bobbi Brown, a makeup artist advised that makeup used around the eyes should be cleaned at least twice a month and those on the skin could be done once or twice a month.
There are two products I would like to recommend for those out there who are swamped with activities and need a fast route to cleaning these brushes. The first is Sephora Collection’s Daily Brush Cleaner ($9) or Color Switch by Vera Mona Brush Cleaner ($15). So if you’re desperate to have them cleaned at a crunch the Brush Cleaners are a life saver. I sometimes actually do combine both products to bring out optimal results.
Mind you these are only quick fixes and really doesn’t solve the problem of cleaning your makeup tools completely. For instance, it is unwise to use dry shampoo as an alternative to actually washing your hair. Thus I discovered two DIY easy methods to clean your makeup brushes pretty good. My goal is to actually make people realize it is easy enough to maintain a consistent brush cleaning habit. So let’s begin!
ANTIBACTERIAL DISH LIQUID SOAP AND OLIVE OIL COMBO
For those of you who do not want to spend a lot of money cleaning and maintaining your makeup brushes through product cleaners smile as there is a cheaper route through stuff that already is in your pantry. I love to cook good food a lot so my bottle of olive oil always come in handy. And of course, everyone should have anti-bacterial dish soap for their dishes. Without further ado let’s get into it!
- I mixed 2/3 antibacterial dish liquid soap along with 1/3 of olive oil in a small bowl.
- I wet all my brushes and sponges in the bathroom faucet. Dip each one into the mixture and swirl them a little.
- I rub the brushes with my fingers to remove debris and rinse properly until all soap along with the makeup is removed.
- All steps are repeated with my makeup sponges as well.
- I squeeze out excess water from the brushes and dry them
I usually lay them flat on my cutting board and hold them with a strap of rubber band or two so I can dry them upside overnight to prevent dust and other particles on them. This method is easy and cost effective as I don’t have to purchase brush shampoo. I satisfied with the outcome since the dish soap is antibacterial and the olive oil helps to moisturize the brushes as well.
THE MAT METHOD
It could be scary realizing knowing you would have to clean at least a dozen of your make up brushes. Knowing you would potentially spend up to an hour in the bathroom makes the whole process unbearable. But not to worry as you could get these done through a cleaning mat. Textured mitts and mats such as the popular Sigma Beauty Express Brush Cleaning Mat ($20) is perfect break up the stubborn and oldest makeup residue without getting your hands all messy. The mat has about seven different sections/textures for all different types of brushes and sponges you may possess. The mat has suction cups at the back to prevent you from accidentally dragging a brush into the sink. This is how I use mine;
- I wet and apply an antimicrobial oil based cleaner onto the brush
- I do a quick swirl of the brushes on the mat
- I rinse out all the uprooted residue with water
- I dry them as well. Sometimes I use a blow-dryer but I wouldn’t recommend you do that often as it could dry out your bristles making it rigid and uncomfortable for makeup application.
THE VERDICT
These two methods are honestly both very effective and easy to use. But overall I think I would prefer the Mat method as it easier and faster than using soap and olive oil. The mat method may have been more expensive to acquire but it takes less than half the time dish soap and olive would take so it’s definitely worth it. However, if you’re on a budget I would definitely recommend the dish soap and olive mixture. As for the drying process, the cutting board method is most effective as it keeps the bristle’s shape and texture intact. This is really important as one wouldn’t get the desired output with misshapen and bad textured brushes. I only use the blow-dryer only at crunch times and in need of the brushes ASAP.


Retinol is regarded as one of the leading skin care products out there amongst dermatologists and beauty experts and editors. Retinol is often referred to as a skincare superhero as it does everything from dark spots to acne. It is indeed a powerful stuff to apply on the skin hence usually, during the first few weeks of use you might experience a reddish face, dried out skin or even peeling. However it is completely natural as your skin is only trying to adjust to the retinol (retinization) but hey, it sucks!
According to dermatologist Rita Linkner, M.D. she stated that “Retinoid causes skin cells to turn over at a faster rate, decrease oil production, and help skin exfoliate” Within six to eight weeks, it clears up and stops acne, lighten hyperpigmentation as well as reducing fine lines like wrinkles and stretch marks until they disappear. Prescription retinoids are really powerful stuff compared to over-the-counter retinoids. So you do not have to visit a dermatologist if you’re having mild skin complication. If however, it persists then seeing a dermatologist for a prescription would be appropriate. Prescription retinoids like Retin-A or tretinoin on your skin is likely to get sensitive and irritated as it tries to adjust to the mechanism of the retinol in action. As for over-the-counter retinol it causes lighter skin reactions as they are formulated to be gentler than the prescribed retinol.
Reactions might last for two week to even a month as your builds up to tolerate it. Sometimes it might feel like hell but with the right amount of patience cool tips and tricks the gold mine awaits you. So don’t give too soon. Below are six tips and tricks if you plan or already using retinol;
PREP YOUR SKIN BEFORE BEGINNING TO USE RETINOL
Just like you heading to a big test or interview you need to prepare yourself for it. The same thing goes to do just that to your skin before you begin to apply retinol on it. What better way is there to prepare your skin for retinol usage other than moisturizing it? Yes, moisturized skin gives a protection barrier for anything you plan to throw at it. According to Ava Shambam, M.D., starting regimented moisturization routine, morning and night, at least a week before you begin to use retinol is key as it prepares the skin for it.
APPLYING MOISTURIZER BEFORE YOUR RETINOL AT NIGHT
It is important to apply moisturizers before applying retinol at night to manage the harshness of it as your muscles are usually more relaxed at night. There are great recommended moisturizing cream out there such Neutrogena Hydro Boost Hyaluronic Acid Gel Face Moisturizer ($16)and Avene Skin Recovery Cream ($25). These are recommended because they have in the hyaluronic acid, antioxidants, ceramides and redness relieving peptides which are essential to reduce the harshness of retinol.
DO NOT APPLY RETINOL EVERY DAY AT FIRST
Retinol isn’t something you start off applying every day. Just like exercise you begin with the easy routine as you build your way up to the complex ones. The same thing goes for retinol usage like I mentioned early retinol is a pretty powerful stuff you should introduce it to your skin gradually then work your way up. Start off by applying maybe twice a week then gradually add a day to it until you build up a tolerance for daily use. However, if your skin has an adverse reaction, take a break from it for a couple of days.
CHANGE UP YOUR SKIN CARE ROUTINE
Your skin gets sensitive during the first week or two to retinol use. That means you your cleaning and exfoliating routine should change. Naturally, using retinol will exfoliate the skin so there’s no reason to embark on any manual exfoliating yourself. It is unwise to apply any other skin care products along with retinol as they can be too harsh on your skin during retinization. According to Shambam “Using a gentle detergent cleanser will allow some natural oils to remain on the skin, reducing the likelihood of developing the irritant dermatitis”
TREAT DRY PATCHES WITH EXTRA MOISTURIZER
One is for sure, using retinol will cause dry patches and peeling. Unless your retinol isn’t doing its job it is bound to happen. To help with the flakiness or cracked up skin during the day it is recommended to use aloe gel or 1 Percent Hydrocortisone Cream ($9) for the irritation.
VISIT THE DERMATOLOGIST WHEN NECESSARY
Yes, redness, peeling and itchiness are expected, but you begin to experience extreme reactions do not persevere instead stop usage and visit a doctor for professional examination. Green says “If the skin starts to crack and you have open lesions which are oozing, you should definitely stop using the product and see your dermatologist. Also, if you develop a rash, this could mean you are having an allergic reaction to the product”
Note that the skin around the eyes is extremely sensitive hence you shouldn’t risk applying retinol at the upper eyelids to prevent it from trickling down to your eyes. It is necessary to protect the entire region of the eye with thick moisturizers before applying retinol on the rest of the face

Check these out.
Lucy Hale is the star of the new CW show Life Sentence and she is known for her loving nature. You’d expect that a celebrity of her stature would only stick to the most exclusive and fancy beauty products but Lucy has somehow found her way around the common products you can find in any drugstore. In her interview with SELF, she answers some questions and shares some of her most fancied products with us. What’s more is that these products all cost below $15.
L’Oréal Voluminous Mascara, $6
“I’ve tried every mascara under the sun, and I find this one gives me the most volume. A lot of mascaras I’ve tried dry out my lashes after a few hours, but this one doesn’t.”
Aquaphor Lip Repair Ointment, $4
“It’s just that staple lip balm. You can use it on your face, cuticles, and lips.”
- Neutrogena Face Wipes, $5.
“I’ve been using these for as long as I can remember. I keep them in my purse and my gym bag. I even leave them on my bedside table, so I can take my makeup off before bed when I’m being too lazy to go and wash my face.”
- Degree Ultra Clear Black and White Deodorant, $4.
“I like it because it doesn’t leave stains or ruin clothes, so I can wear my favorite items again and again.”
- Essie Nail Polish in Ballet Slipper, $8
“It’s my go-to polish. It’s such a good nude color.”
- Cetaphil Face Lotion, $13
“I have really sensitive skin, and Cetaphil moisturizes really well without making me break out.”
- Kristin Ess Dry Shampoo, $14
“I swear by dry shampoo. I don’t like washing my hair too frequently, so dry shampoo is essential to refresh my look. This one makes me feel clean, and it has this incredible but hard-to-pinpoint scent.”

I’m not less natural if I cover my hair.
Anybody who goes natural surely loves their hair but that journey is not devoid of its own challenges like kinks and coils. A lot of the times we see a celebrity hair style we admire and try to get something like that done only to realize we’ve made a huge mistake. Sometimes you also have to deal with hair damages as a result of faulty hair hot combs.
We all turn to wigs for different reasons. It’s often weird when you wear a wig for the first time and you find yourself being very nervous. It feels like everybody knows you’ve put on fake hair. It’s always surprising when people start to commend you on your new style and you then start to grow in confidence. Before you know it, you’re hooked on wigs because they tend to free up all the time you used to spend on your hair and you now get to focus that time on other things.
A wig can also help protect your natural hair and give it time to grow and thrive without any pressure of constant styling and tweaking. Your hair being safely tucked away tends to require less trimming, combing and tugging with your coils.
There are the hardcore natural hair people who believe wearing anything other than your natural hair is a bad idea. It really shouldn’t be that deep. Wearing your natural hair is not a statement of any kind neither is wearing a wig an affront to any such statement.
The natural hair movement kicked off in the early 2000s. Women began to proudly wear their natural hair, grow out their perms and roc their afros as a symbol of black pride and beauty. It is a good thing to see and it can be a sort of political statement in itself but there should be room for roaming.
One of the attractions of keeping your natural hair is its versatility. You can decide to braid it, wear it straight, keep and afro and heck you can decide to wear it under a wig. Celebrities such as Oprah and Beyoncé have been known to wear wigs a lot of the time so you don’t have to feel bad doing the same.
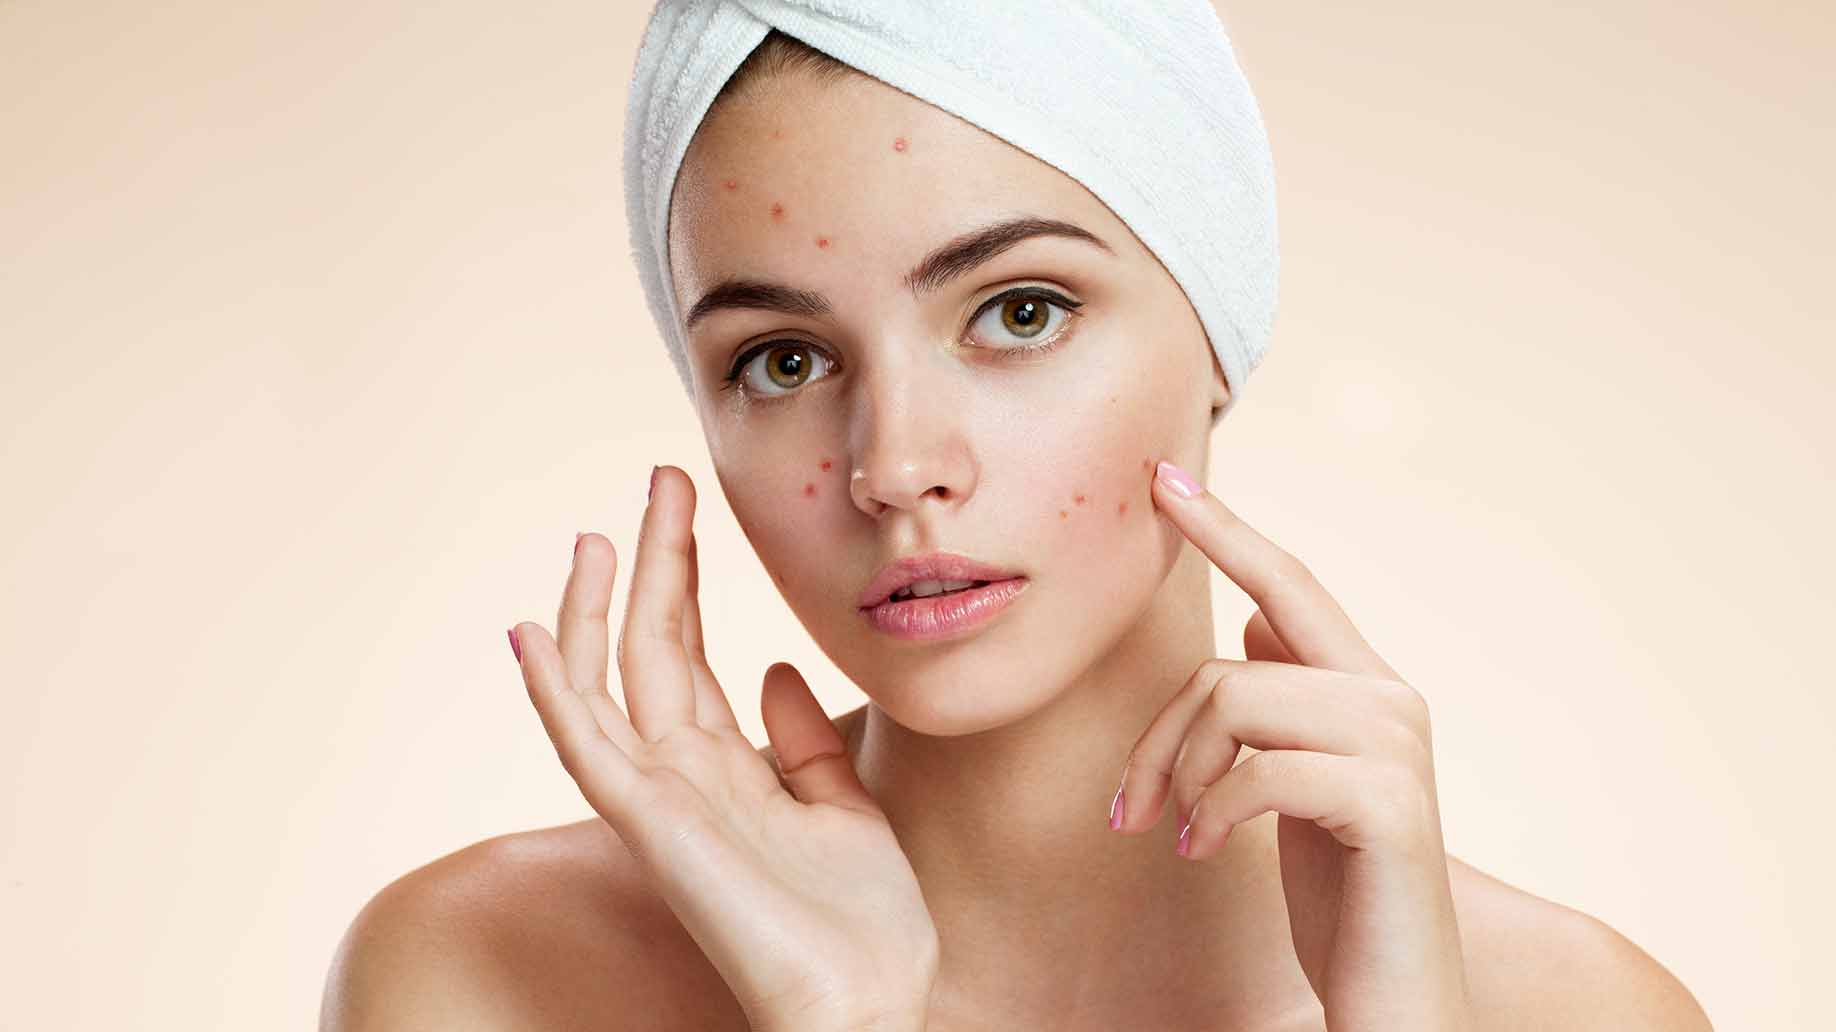
If you have ever suffered from acne as a teen or adult, you can relate to that pervasive self-consciousness: everyone seems to be staring at your skin. If you wish to have your pimples and acne temporarily disappear – or at least seem to – this video by YouTube vlogger Jess Bunty is the most authentic and straightforward tutorial we’ve discovered.
Here, we have broken down her tips.
- Start fresh
Ensure you clean and moisturize your skin for a proper base for your makeup – oily skin inclusive. Choose a moisturizer made for your skin type, such as Ole Henriksen Counter Balance Mattifying Moisture Crème
- Apply primer
With your fingertips, apply a primer to make sure your makeup spreads smoothly and stays on. Jess recommends Rimmel London Fix & Perfect Pro Primer. She advises you wait for a few minutes before applying foundation.
- Rub in concealer to spots in a criss-cross motion
Jess says she uses a copious amount of concealer for a better spread. If you are using the concealer from a pot, make sure to use a new cotton swab each time to scoop it out. This will help prevent cross-contamination from fingers and broken-out skin. Try applying the concealer in an “X” pattern to completely cover the blemish from all sides. The NYC Concealer Jar is a great choice and reasonably priced too.
- Gently pat the concealer into your blemish
With your finger pads, softly press your concealer to blend into each blemish. Avoid the temptation to rub it, or you might end up with streaks.
- Do not forget under-eye circles
While waiting for your makeup to set, put on another concealer, like Benefit Boi-ing Hydrating Concealer to any dark patch or discoloration under the eye. In addition, you should use our concealer trick to remove any dark circles perfectly.
- Soak-up excess with a tissue
Subtly press a tissue against your skin to absorb any excess makeup and make the finish look as natural as possible.
- Use a stippling brush to apply liquid foundation
You can now rest your fingertips; Jess says her stipple brush delivers “good coverage and an airbrushed, even finish” when it comes to putting on the foundation. Gently dab on the liquid makeup in round motions to get coverage and avoid wiping off the concealer already in place. Start with a small amount and gradual build up to avoid overdoing it.
- Set your makeup
Give your makeup some more minutes to set, then apply either a pressed powder or finely-milled loose powder to keep it all in place the entire day. Jess recommends e.l.f. High Definition Powder. For a brilliant result, use a large fluffy brush to dab on your powder in a stippling motion.
- Lock-in your look with a finishing spray.
Use a setting mist like Supergoop Defense Refresh Setting Mist Broad Spectrum SPF 50 to spray your handiwork. This will dissolve any caked part of your heavy makeup as well as make it last.
Then, layer on the rest of your makeup — Jess suggests a bold lip or eye to draw attention away from any bumps that may still be showing — and you’re good to go!
-

 Lifestyle6 years ago
We Don’t Know How Lucky We Have It
-

 Fashion6 years ago
Jessica Biel Partners with Gaiam on New Line
-

 Fashion6 years ago
Aerie’s Brand New Swim Campaign goes personal: Features Aly Raisman and mom
-
 Lifestyle6 years ago
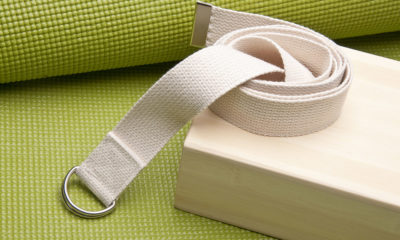
5 Reasons You Shouldn’t Feel Bad About Using Props for Yoga
-
 Health6 years ago
Why Do the Corners of My Mouth Crack—and How Do I Fix It?
-

 Fashion6 years ago
This is how to make your wardrobe more sustainable
-
 Health6 years ago
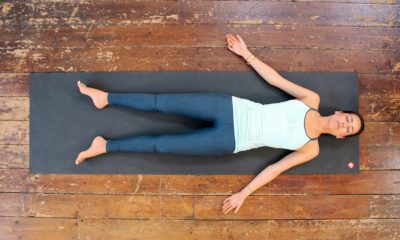
Why You Must Stick with Savasana
-

 Fashion6 years ago
Stylish Sportswear That Actually Makes You Want to Work Out